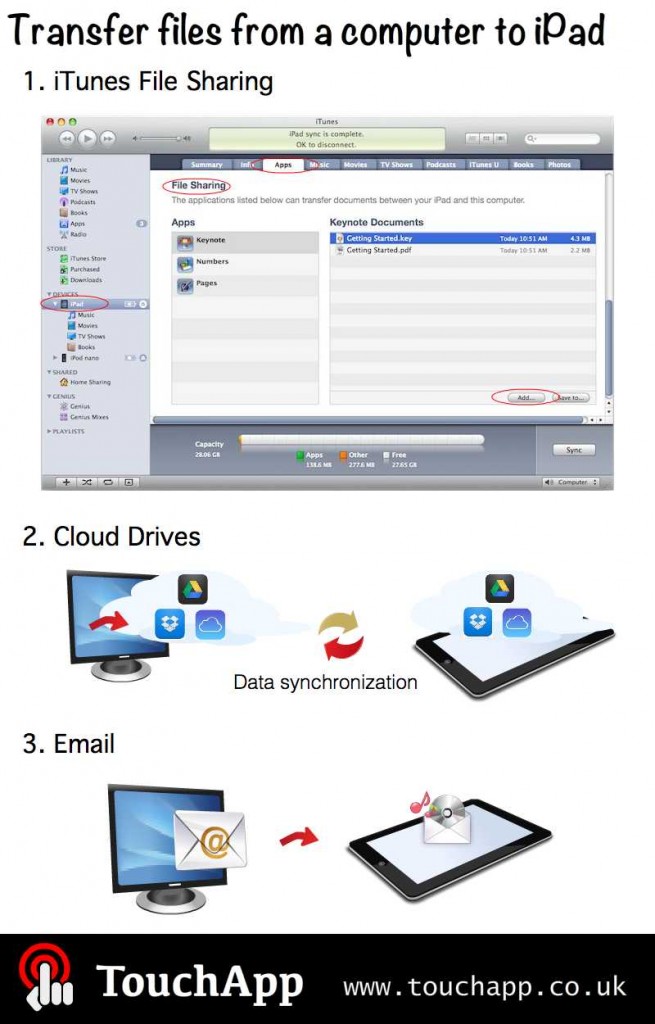
As an important educational transformation technology, iPad is becoming more and more popular among teachers. From time to time, teachers and students need to transfer files from a computer to an iPad; here we are presenting 3 different ways to transfer your files to iPad from your computer – iTunes (file sharing), Cloud Drives and Email. Hope these approaches will help to facilitate the iPad adoption in your school.
Method 1: iTunes File Sharing
a. Connect your iPad to your computer with the provided Dock Connector to USB cable
b. Launch iTunes on your computer (iTunes 9.1 or later)
c. Select the iPad in the list on the left side in iTunes
d. Click the “Apps” tab and scroll down to the bottom of the iTunes window is a section titled File Sharing. Note: If you do not see the File Sharing section shown in the image below, your iPad does not have any apps that support File Sharing.
e. Under the File Sharing section, you’ll find a list of apps currently installed on your iPad device that support File Sharing. Select an app (for example Keynote) to view a list of the files associated with that app on your iPad device. Then add the file you want to transfer to the iPad Documents pane by drag and drop. Or by clicking the Add button and locate the file or files you want to copy from your computer, and click Choose. The selected files will be copied to the app on your iPad.
iTunes File Sharing also works with other iOS device (iPhone, iPod Touch, etc.). Your computer can be a Mac or Windows computer with iTunes installed.
Method 2: Cloud Drives (Dropbox, Google Drive etc.)
a. Create an account for a cloud drive service. There are many cloud drives including Apple’s iCloud, Google’s Google Drive and Dropbox (most of these cloud drives offer 2-5GB of free disk space).
b. Although you can use web client (web browser) to upload you file to the cloud. It is usually more convenient to use native client and you just need to download and install a computer client (download from cloud service website) and an iPad client app (from Apple app store).
c. Once you have the Cloud account set up, you just drag and drop files from your desktop to the cloud drive.
d. Then on your iPad, you can open the cloud drive app and open the transferred file.
Method 3: Email attachment
This method is OK for small files but many email clients don’t support large files (>10 Mb)
a. Whichever file you need (.doc, images, mp3 etc.), just send it as an attachment to yourself.
b. Open the iPad Mail App and the file will be available locally.
Follow us on Twitter: @TouchApp_uk
From Mobile App development company TouchApp
![]()
